Evernote is one-third of my digital planning system. I use OmniFocus to track what I need to do, Fantastical to track where I need to be, and Evernote to record a log of what I’ve done.
On both macOS and iOS, OmniFocus and Fantastical have ways to capture pretty quickly. You’re never more than a few taps, keystrokes, or spoken words away from creating a new task or meeting.
Updating your daily record in Evernote isn’t so easy. Evernote will let you quickly create a new note, but we need to be able to update an existing note. On macOS, I solved this problem a long time ago with an AppleScript that will find or create the right note and add a new entry. It made updating my daily record almost frictionless.
On iOS, the friction was still there. Making an entry on the go was so tedious that instead of recording what I had done right then when it happened, I’d try to remember it to do it when I got back to my Mac. You can guess how well that worked.
Fortunately, I just found a solution that makes updating your daily record on the go as simple as doing it at your desk. In fact, I’ll sometimes use my phone (okay, watch) to make an entry because it’s kind of fun.
Here’s how to use a custom action in Drafts to take a captured note and add it to today’s daily record in Evernote.
Set Up Evernote
Before we start creating the action in Drafts, we need to make sure Evernote is configured the way we want it. If you’ve been using Evernote as part of your digital planner, you might have already done this.
- Create a notebook titled “Planner”.
This gives us a place to put all of our daily records, goals, roles, project support, dream board, and personal mission statement.
Creating Your First Custom Action
Now to create the action. Open Drafts, then:
- Tap the Drafts icon on the top right to open the actions drawer.
- Tap +.
- Tap Create Action.
You now have a blank action. Let’s give it a name.
- Tap in the empty space under the name section.
- Type
Add to Daily Record. - Tap on the empty checkbox.
- Tap the Evernote icon.
- Tap green.
Now we get to the steps—what we want the action to do. This is the heart of the automation.
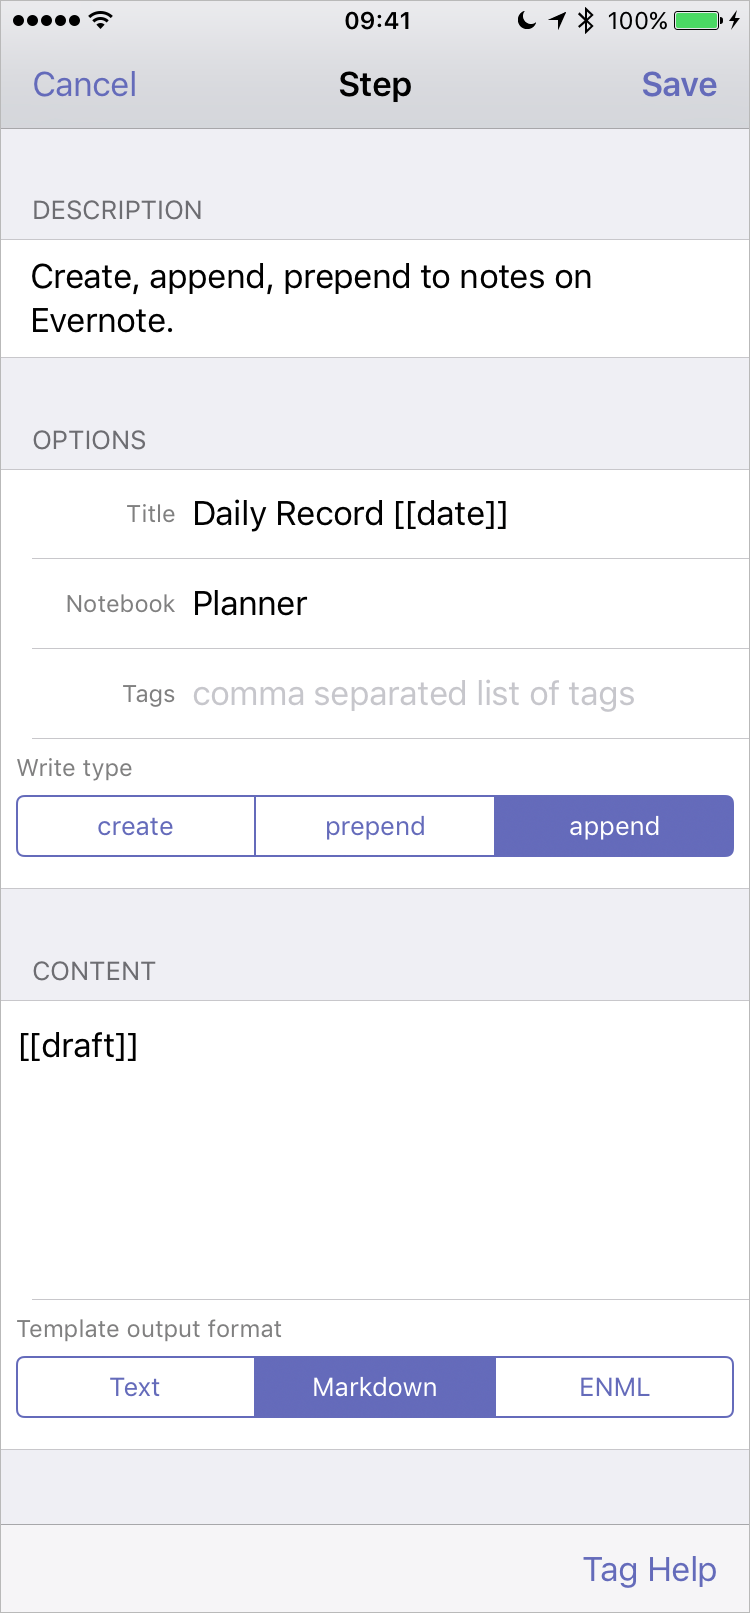
- Tap on “0 steps”.
- Change the title to “Daily Record [[date]]“. This uses the YYYY-mm-dd format, which is perfect.
- Change the notebook to “Planner”.
- Change the write type to “append”. This is important because we want all of the entries for a day to be collected into the same note.
- In the content, add an empty line after “[[draft]]” (put the insertion point at the end of the line and press return twice). This way, each entry will be its own paragraph.
- Save. There’s only one step, so tap “< Action”.
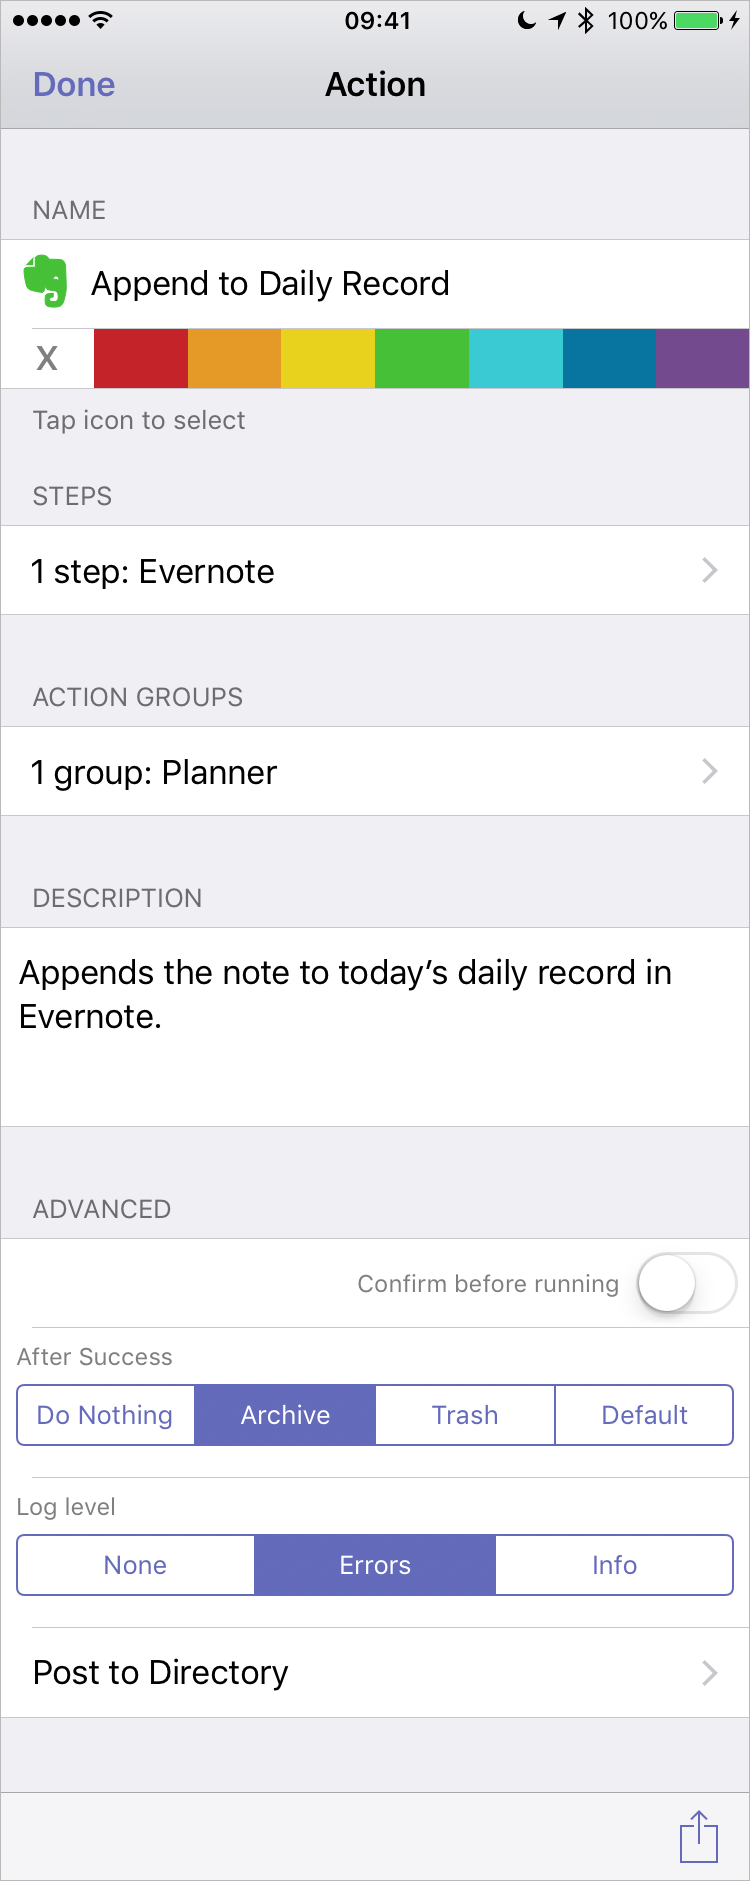
A few more fields to consider on the action:
- An action should have a good description. Future you will thank you. It doesn’t have to be much: “Appends the note to today’s Daily Record in Evernote”.
- Your first custom action or two can probably fit into one of the predefined groups: Basic, Social, Services, and Markdown. As you start adding more actions, you’ll want to create your own groups to keep them better organized. For example, I created a Planner group to keep the half-dozen planner-related actions together.
- When you first write an action, leave the After Success behavior to “Default” or explicitly change it to “Do Nothing”. Once you know the action works the way it should, switch it to Trash so you don’t have to delete the note manually each time you capture.
Pro tip: When you go to edit an action, you need to swipe the action to the right (then tap the pencil). It took me forever to figure that out.
Try It Out
Run the action. Find the note in Evernote. Is the entry there? Great! Now do two more. Did it append properly? Awesome! Now use it for a few days before you flip the switch to remove the note after running the action.
If it’s creating a new note each time, you need to change the write type to append. “Append” will update an existing note if it finds one with that name. “Create” will create a new note each time you run it.
If the text is all smashed together, you forgot to add the empty lines in the content (step 13).
Once you have identified a workflow (and decided it’s something you want to do), figure out how to automate it. It takes only a few minutes to create a custom action in Drafts. That custom action will let you perform the workflow more quickly and with more consistent results. Most importantly, it removes the friction (wasted energy) from the workflow, making it more likely you’ll do it.
Question: What is your favorite custom action for Drafts? What custom action would you like to see? Share your thoughts in the comments, on Twitter, LinkedIn, or Facebook.